Creating a Category
In Quant, all products must be divided into categories. In the Categories section, you can create a hierarchy of categories consisting of parent categories and subcategories. Each category can then be filled with products.
How to create a new category?
- In the Categories section, click the New button.
- Enter the Category Name.
- Click Ok.
Creating a new category
The created category will appear in the table. In the right panel, you can then edit its properties. If you mark the category, you can use the Set Parent button to place it in the category hierarchy— setting which category will be its parent.
Set Parent Category
Category hierarchy and setting category properties
For each created category, it is very useful to set its color. This color will then automatically appear in the floor plan for fixtures that have this category assigned, significantly improving the clarity of the space.
How to add products to a category?
Products can be assigned to a category in two ways:
- Product Filter - the most commonly used method. Products are assigned based on a specific attribute that was imported via Importing Products. You can define one or more conditions according to which products are automatically assigned to a category. For example, for the Dairy Products category, the value "Dairy Products" is imported into the "Category 1" attribute for all products that should belong to this category.
- Individually Assigned Products - this method allows you to manually select specific products from the list of all products in the database and assign them to the chosen category. It is especially useful when products cannot be easily assigned using a filter or when only a limited number of specific products need to be assigned.
Procedure for assigning products using the Product Filter method
- Select the category to which you want to assign the products.
- In the right panel, click the Product Filter row.
- In the newly opened window, click Add Rule.
- Click Add Product Condition.
- Set the condition:
- select the product property,
- choose the comparison type,
- set the desired value.
- Click Ok to confirm.
- Click the Save button to add the products to the category according to the filter.
By clicking Show Matching Products, you can check before saving which products meet the set condition and how many products will be assigned to the category.
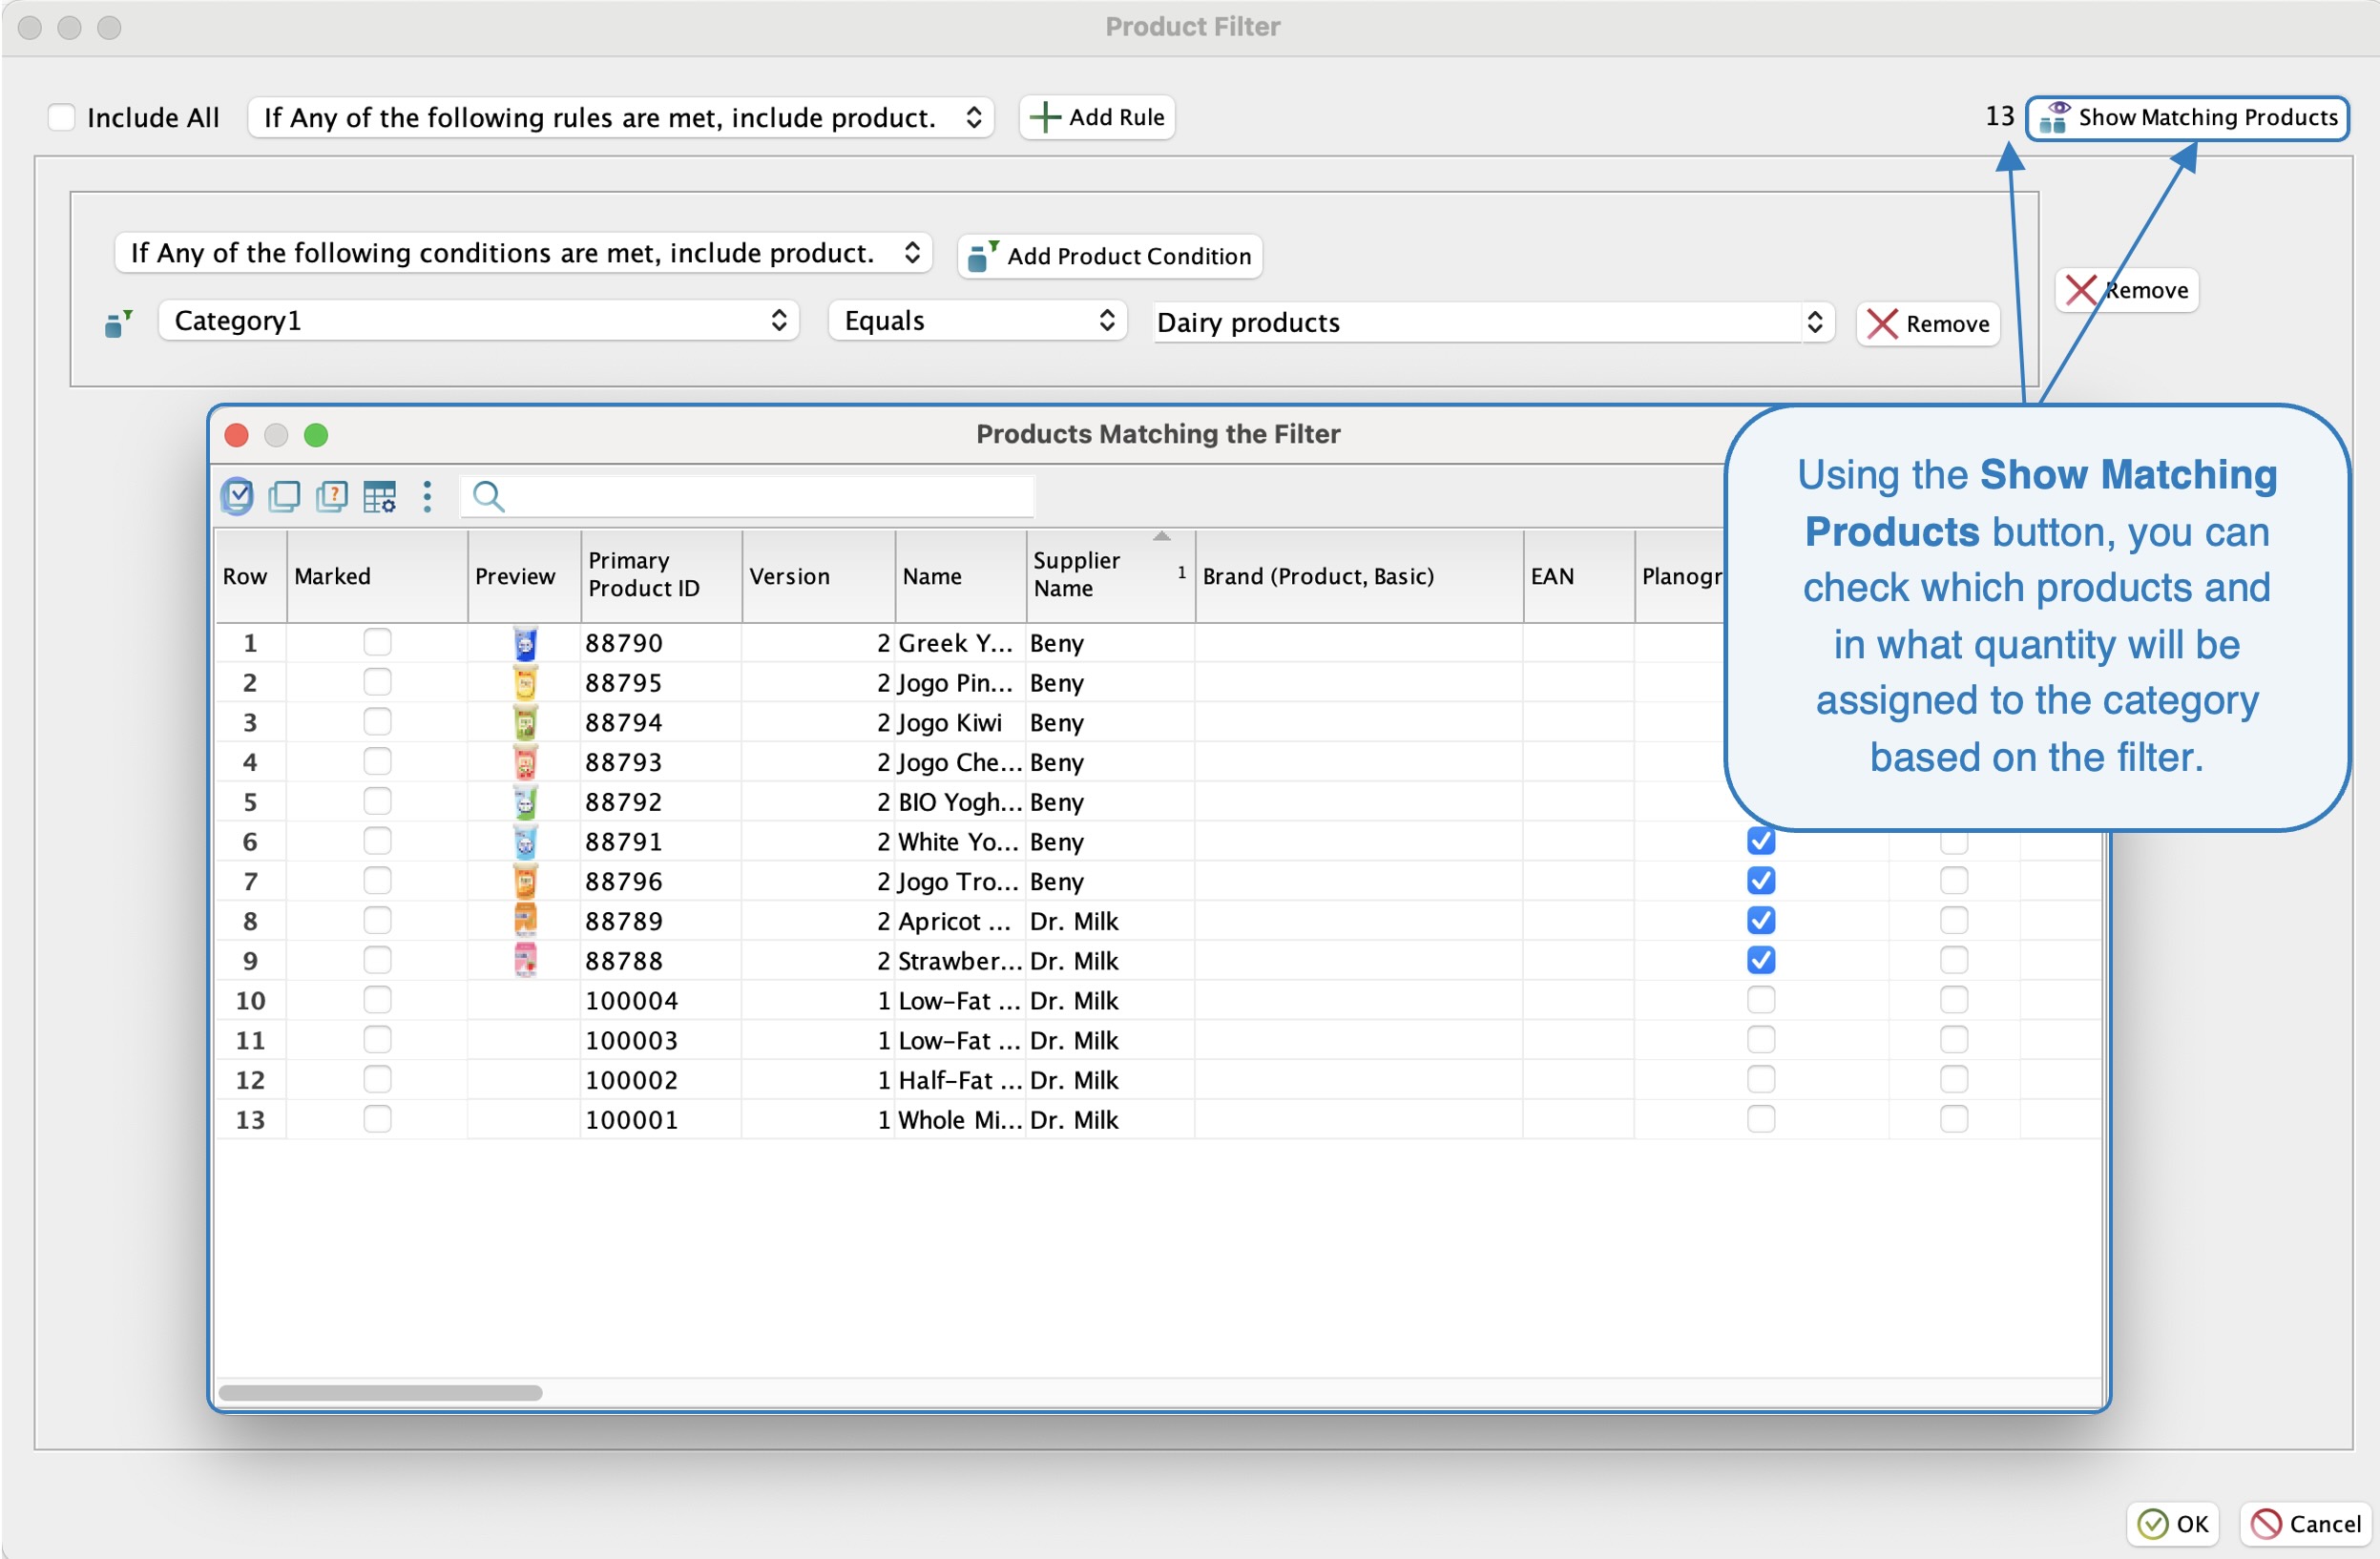 Show Matching Products
Procedure for assigning products using the Individually Assigned Products method
- Select the category to which you want to assign the products.
- In the right panel, click the Individually Assigned Products row.
- In the newly opened window, mark the products that should belong to the chosen category.
- After marking, click Ok to confirm.
- Finally, click Save to save the category.
After completing product assignment, click Save to save the rules or selected products.
More information about categories can be found in the Basic Settings of Categories manual.
In Quant, it is also possible to automatically create a category hierarchy. Details of this procedure are described in the Automatic Creation of the Category Hierarchy manual.