Signs in the Template
Blocks in the Template can be marked with different signs. Each sign holds a specific meaning that informs about block properties.
This manual will guide you through all signs in the Template and their meanings.
Sign of Priority
This sign informs about Priority level of the block and it is placed in the top-left corner. Three types can be discerned, each in unique colour:
- Optional priority level - Green
- Required priority level - Orange
- Fixed priority level - Blue
You can set Adjusted Priority Level in the Block Properties tab. This setting will draw black border around priority sign in the Template.
Products where action settings are applied in store specific planograms work with Priority level set in Actions Tab. In case there is set different Priority level in product properties and in Action Tab it will be shown on the priority sign in the Template. This sign will be made up of two parts:
- Outside border– original product priority level set in product properties in Products Tab
- Inner square – priority level set in Actions Tab
Signs of Advanced Block Properties
There are two advanced block properties displaying in the Template that can be set in Advanced section of the Block Properties tab.
- Back Stock – white background
- Prevent Planogram Placement – Crossed out product with cross out icon in the top-right corner
Signs for Block Nesting
If you nest block that differs from the primary block you will notice number in the bottom right corner of the Template. This number informs you about different blocks in total at this position.
Adjusted Measurements
When you set Adjusted Measurements of Package in the Block Properties tab the block in the template will be orange framed.
Products that don’t belong to category
If you place a block which is assigned to a different category than the Equipment you will see crossed out green category sign in the top-right corner of the block.
Block Repeating
If you place the same block to the Template more than once, little brown product icon will appear in the top right corner. This sign will be displayed on both identical products, on the primary and newly added as well.
Unplaced block in Planogram
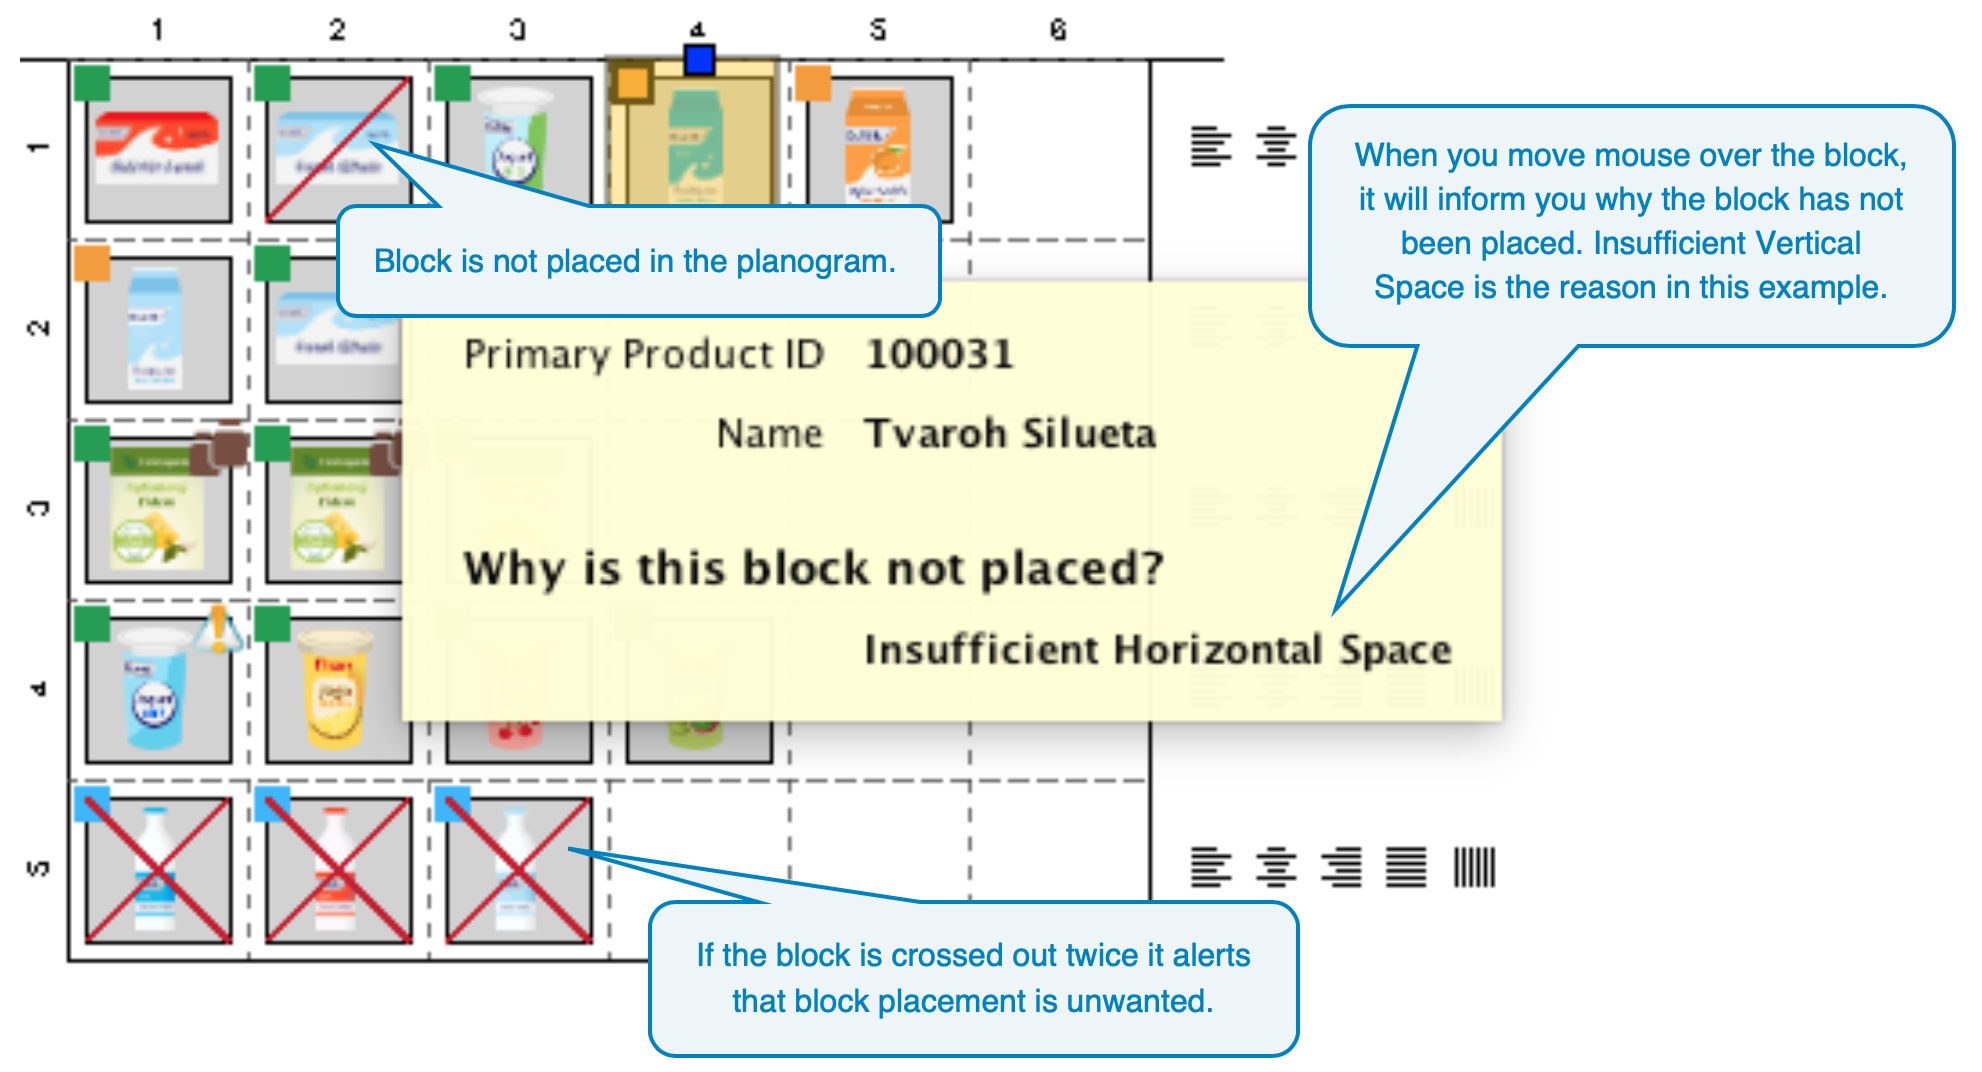
If for some reason block isn’t placed to planogram, it will be crossed out in red in the Template. When you move your mouse over the block you can display tooltip clarifying you why the block has not been placed.
Block can be crossed out with single or double line and it represents block unplacement in the Planogram. Single line indicates less important reason of block unplacement:
- Block is not placed because of Insufficient Horizontal Space
- Block will not be placed in case of low product sales in store specific planograms
If the block is crossed out twice it indicates more significant reason of block unplacement:
- Block is not placed because of Insufficient Vertical Space

Block with negative margin
Using negative margin in the Block Properties tab will cause that block will overlap borders of the shelf or a different product. For this case warning icon with yellow exclamation mark will appear in the top right corner.
Product with Replacement ID
Sign with two arrows in the top right corner gives you information that Replacement ID has been filled for the product in: Products Tab / Product Properties / Basic section.
Restricted Product
When you see red exclamation mark in the top right corner of the Template it supposed to alert you that this product belongs to a group found in Restricted Products Tab.
You can set Restricted Products in menu: Project / Properties / Basic in the row Restricted Products