Automatic Shelf Heights
Automatic shelf heights are used when the shelves are not fixed and can be moved according to the height of the products. Quant can generate shelves automatically based on the set criteria and adjust them to the height of the products.
In this manual you will find a description of these attributes:
- Use Automatic Shelf Heights
- Shelving Area Height
- Number of Available Desks
- Desk Height
- Minimum Desk Distance
- Own Shelf Depth
- Own Bottom Shelf Depth
- Top Desk Fixed / Top Desk Distance
- Top Shelf Open
- Minimum Distance from Base
- Free Space Above Products
Setting automatic shelf heights can be found in the Fixture Properties tab.
Setting properties
Use Automatic Shelf Heights
Check this box if you are setting up a fixture that has moveable shelves.
Shelving Area Height
Set here how much height space products can occupy. This is the height from the bottom shelf to the top desk, which limits the height of the fixture.
 Shelving Area Height in planogram
Number of Available Desks
Set here the maximum number of shelf desks that can be in the fixture. If there is no restriction that there can be e.g. a maximum of 6 shelves in the fixtures, then you can set a high number here (e.g. 10), because the number of shelves will then be determined by the height of the products in each shelf. The base of the fixture is not counted as one of the desks (if you set the number of desks to 6, you will have 7 shelves in reality).
Desk Height
Here you set the height of the individual shelf desk on which the products are placed.
Minimum Desk Distance
If there is any restriction on the minimum distance between two desks in the fixture, fill in the minimum distance here.
When creating a planogram, the number of shelves that is set as Number of Available Desks is displayed by default. In our case, a total of 11 shelves (10 desks) will be displayed.
The number of shelves corresponds to the number of rows in the template, unless there are more rows in the template than the number of available desks+1. You can add and remove shelves by adding or removing rows in the template.
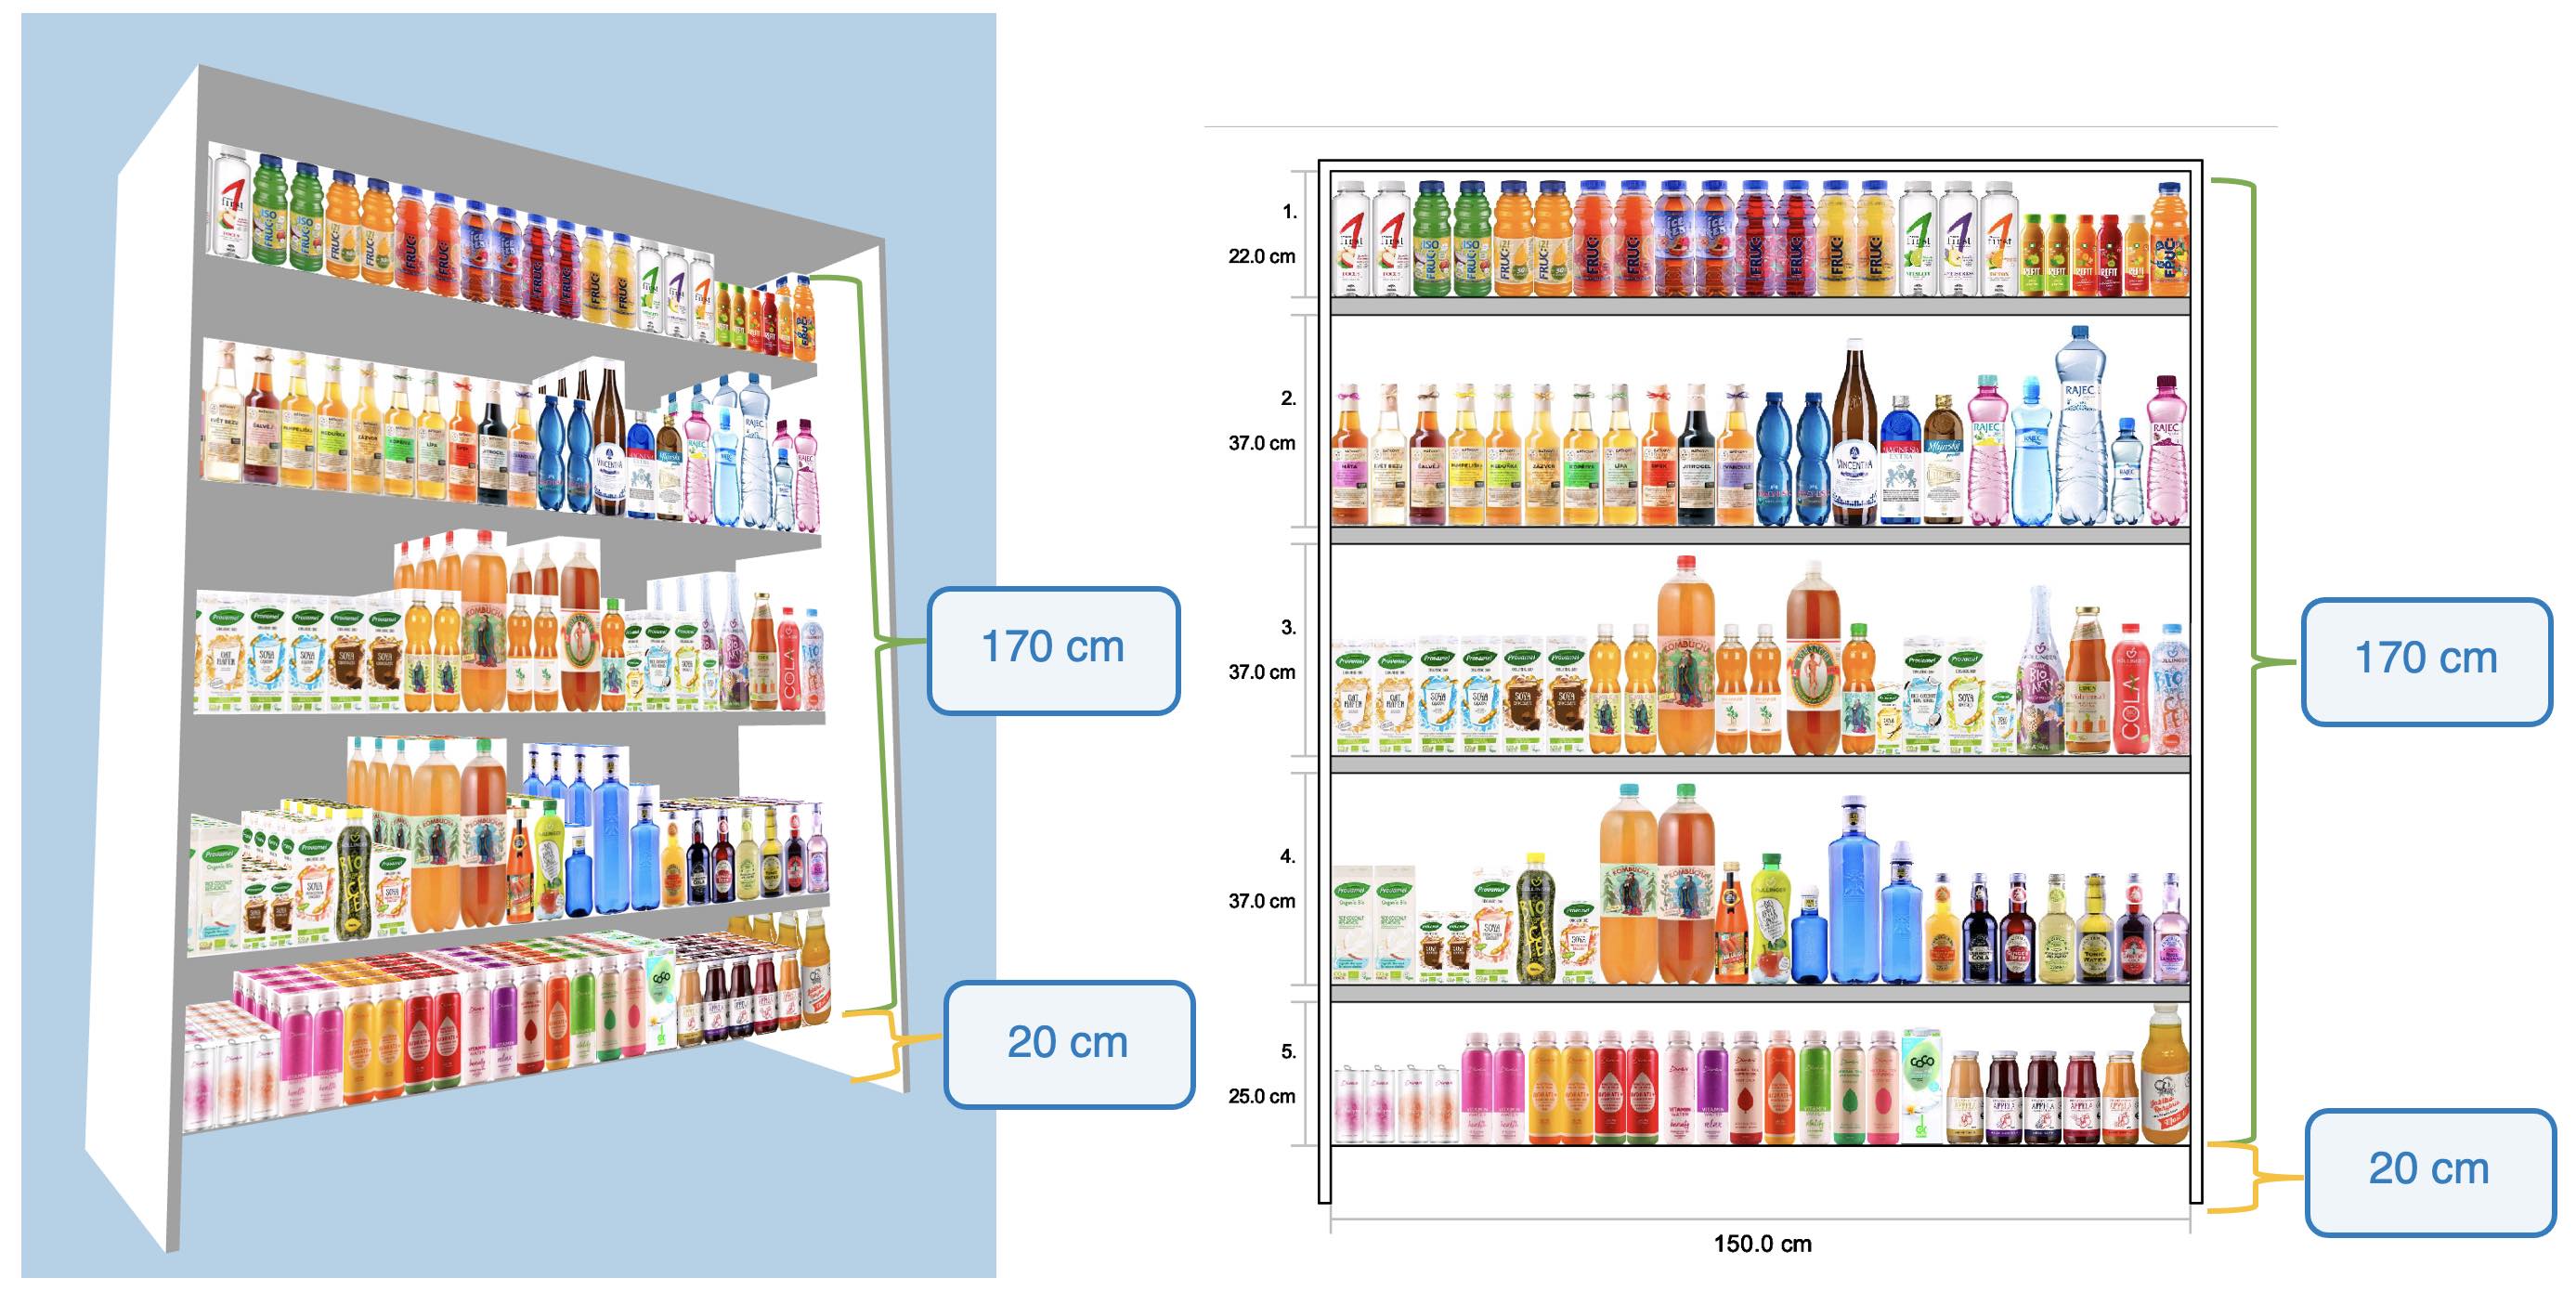
However, the final number of shelves will be determined by the height of the products on each shelf. In our case, a total of 5 shelves were created. The height of the shelf is always adjusted to the tallest product on the shelf.
Own Shelf Depth
The depth of the fixture is set directly in the fixture preview. However, if the fixture is differently deep than the shelves, the Own Shelf Depth must also be set. By default, the shelf depth is the same as the fixture depth.
Always set the fixture depth to the one that should be reflected in the floor plan.
Own Bottom Shelf Depth
If the base (bottom shelf) has a different depth than all other shelves, set this depth here.
Top Desk Fixed / Top Desk Distance
Check the Top Desk Fixed box only if the top shelf has a fixed distance from the top of the fixture. You must then fill in this distance in the Top Desk Distance line.
Top Shelf Open
If the fixture is open from the top and there is no restriction in the form of a top desk, so that the products can be as high as you like, tick the Top Shelf Open checkbox.
Minimum Distance from Base
Fill in this property only if the bottom shelf must have a minimum distance from the base.
Minimum Distance from Base in planogram
The remaining dimensions must be filled in directly in the fixture preview (fixture width, base height, side panel thickness or back and top panel thickness).
For each fixture for which you want to use automatic shelves, you must check the Automatic Shelf Heights box, set the Shelving Area Height, Number of Available Desks, and the Desk Height. The other properties are only set if you need to achieve a specific design.
How do you ensure that there is always free space above the products to create a space reserve between the product and the shelf desk?
With automatic shelves, the height of the shelf is adjusted to the highest product, so there may be a situation where there is no free space above the highest product. In reality, however, it is better to leave a certain space margin so that products can be easily inserted into the shelf and at the same time easily removed from the shelf. The Free Space above Products property can be set for this purpose.