Tasks Web Settings
The task form or the task overview tables can be easily adapted to your requirements. You can add different columns to the table or remove some. Fields in the task form can also be added or hidden or set to be editable, for example. In addition, you can set different designs for different user groups.
You can find the Web Tasks settings in the Web Settings section under Tasks Web Settings.
Click the New button to add a new configuration, which you can then edit in the right pane.
The newly added configuration is set to what the web settings currently look like. That is, if you have a specific request such as I want to add column Stock Level to a table on the web, you just need to add the property in the Table property and save. You will find more detailed steps here.
The Task Web Settings are divided into 4 tabs:
- Tasks Table - setting up a task overview table
- Basic Information - task form settings in the Basic Information section
- Context Details - task form settings of the Context Details section
- Products Table - setting of a table with products
Properties Setting
For each configuration, you can set additional properties on the right after adding a new configuration. Many properties are repeated:
- Parent Container - This is the configuration from which the values will be taken. Use this if you have multiple configurations set up and you only want to make minor changes to the new configuration compared to another, so you set the original configuration as the parent.
- Name and Display Name - Fill in the name of the configuration. The Display Name appears in the web selection if you have multiple configurations available.
- Container Title - Title of the section. You can see an example of a container title for the Context Details section in this image.
- Show Container Title - If the box is checked, the title will be displayed.
- Desktop Rights - Determines who will see this configuration in Quant, or who will be able to edit it.
- Web Access - Here you set the user groups who should have this configuration available on the web.
One user can have multiple configurations available at the same time. For example, you can set different table layouts for Category Manager and Store Manager. The Store Manager will only have access to its configuration, but the Category Manager can have access to both and can switch between them on the web. This way, you don't have to create multiple users with different user roles when setting up and testing Task Management and constantly logging in under a different user to check the table appearance for different users.
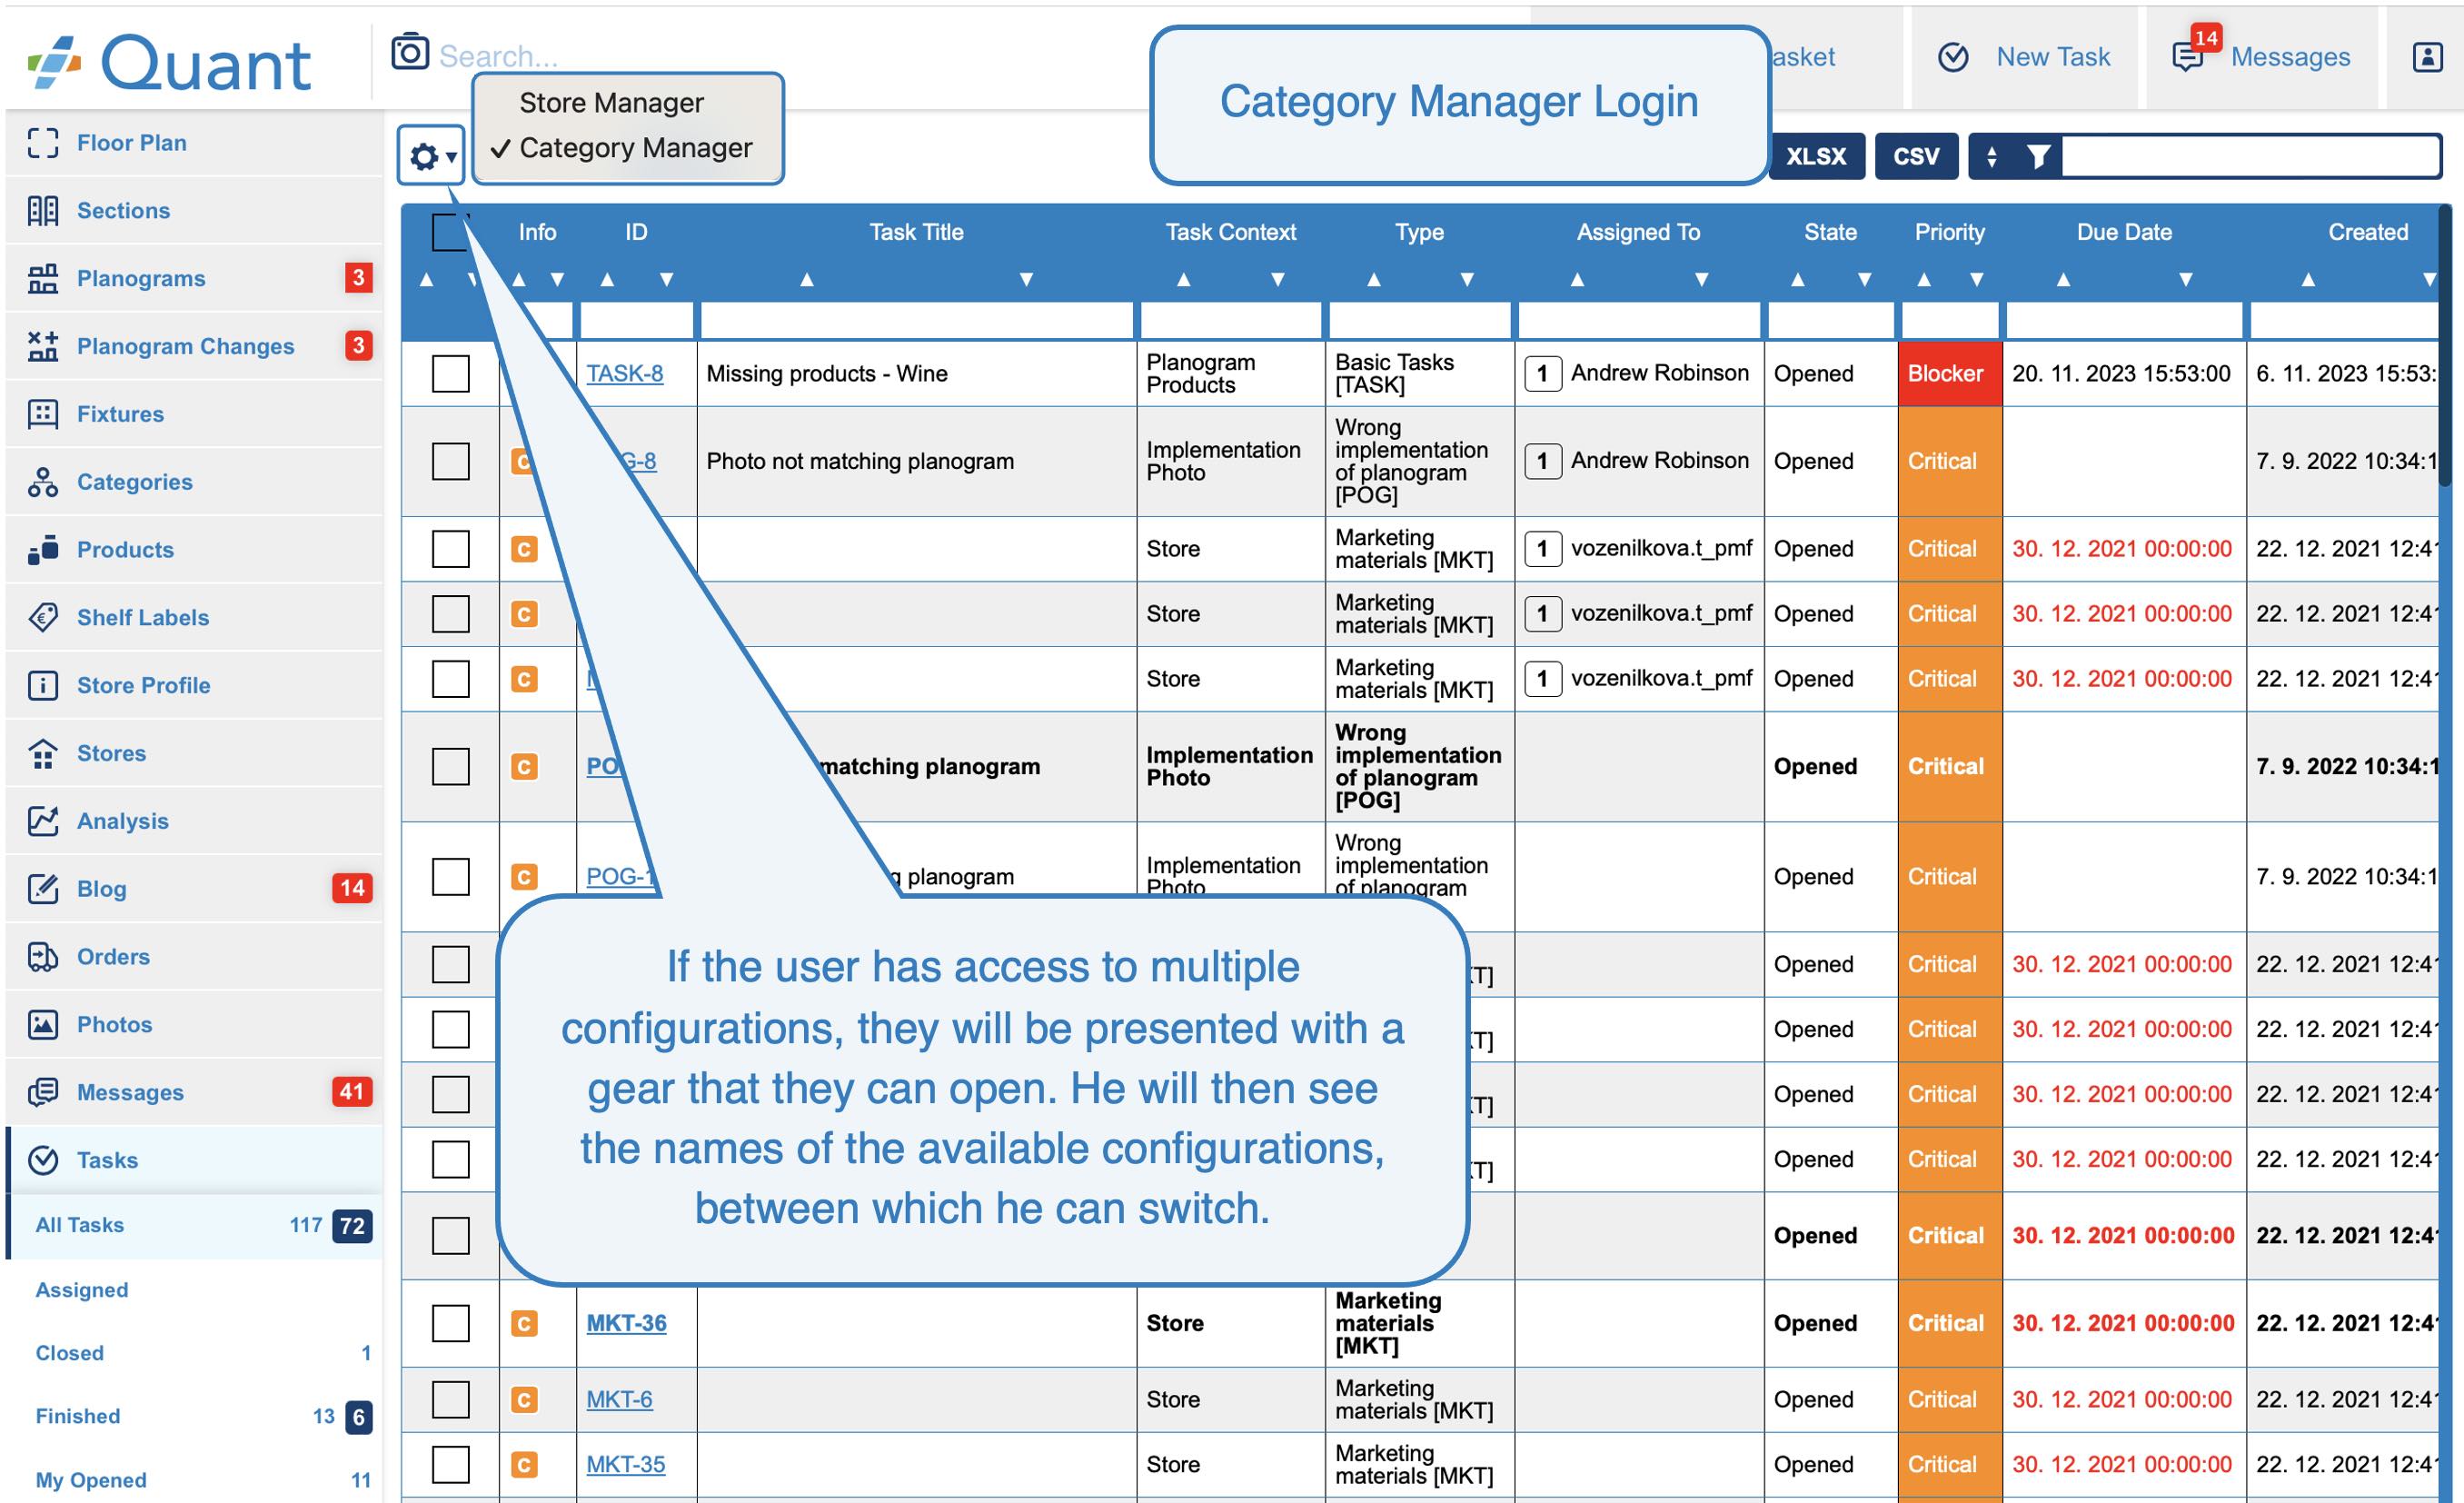 Multiple configurations for a table
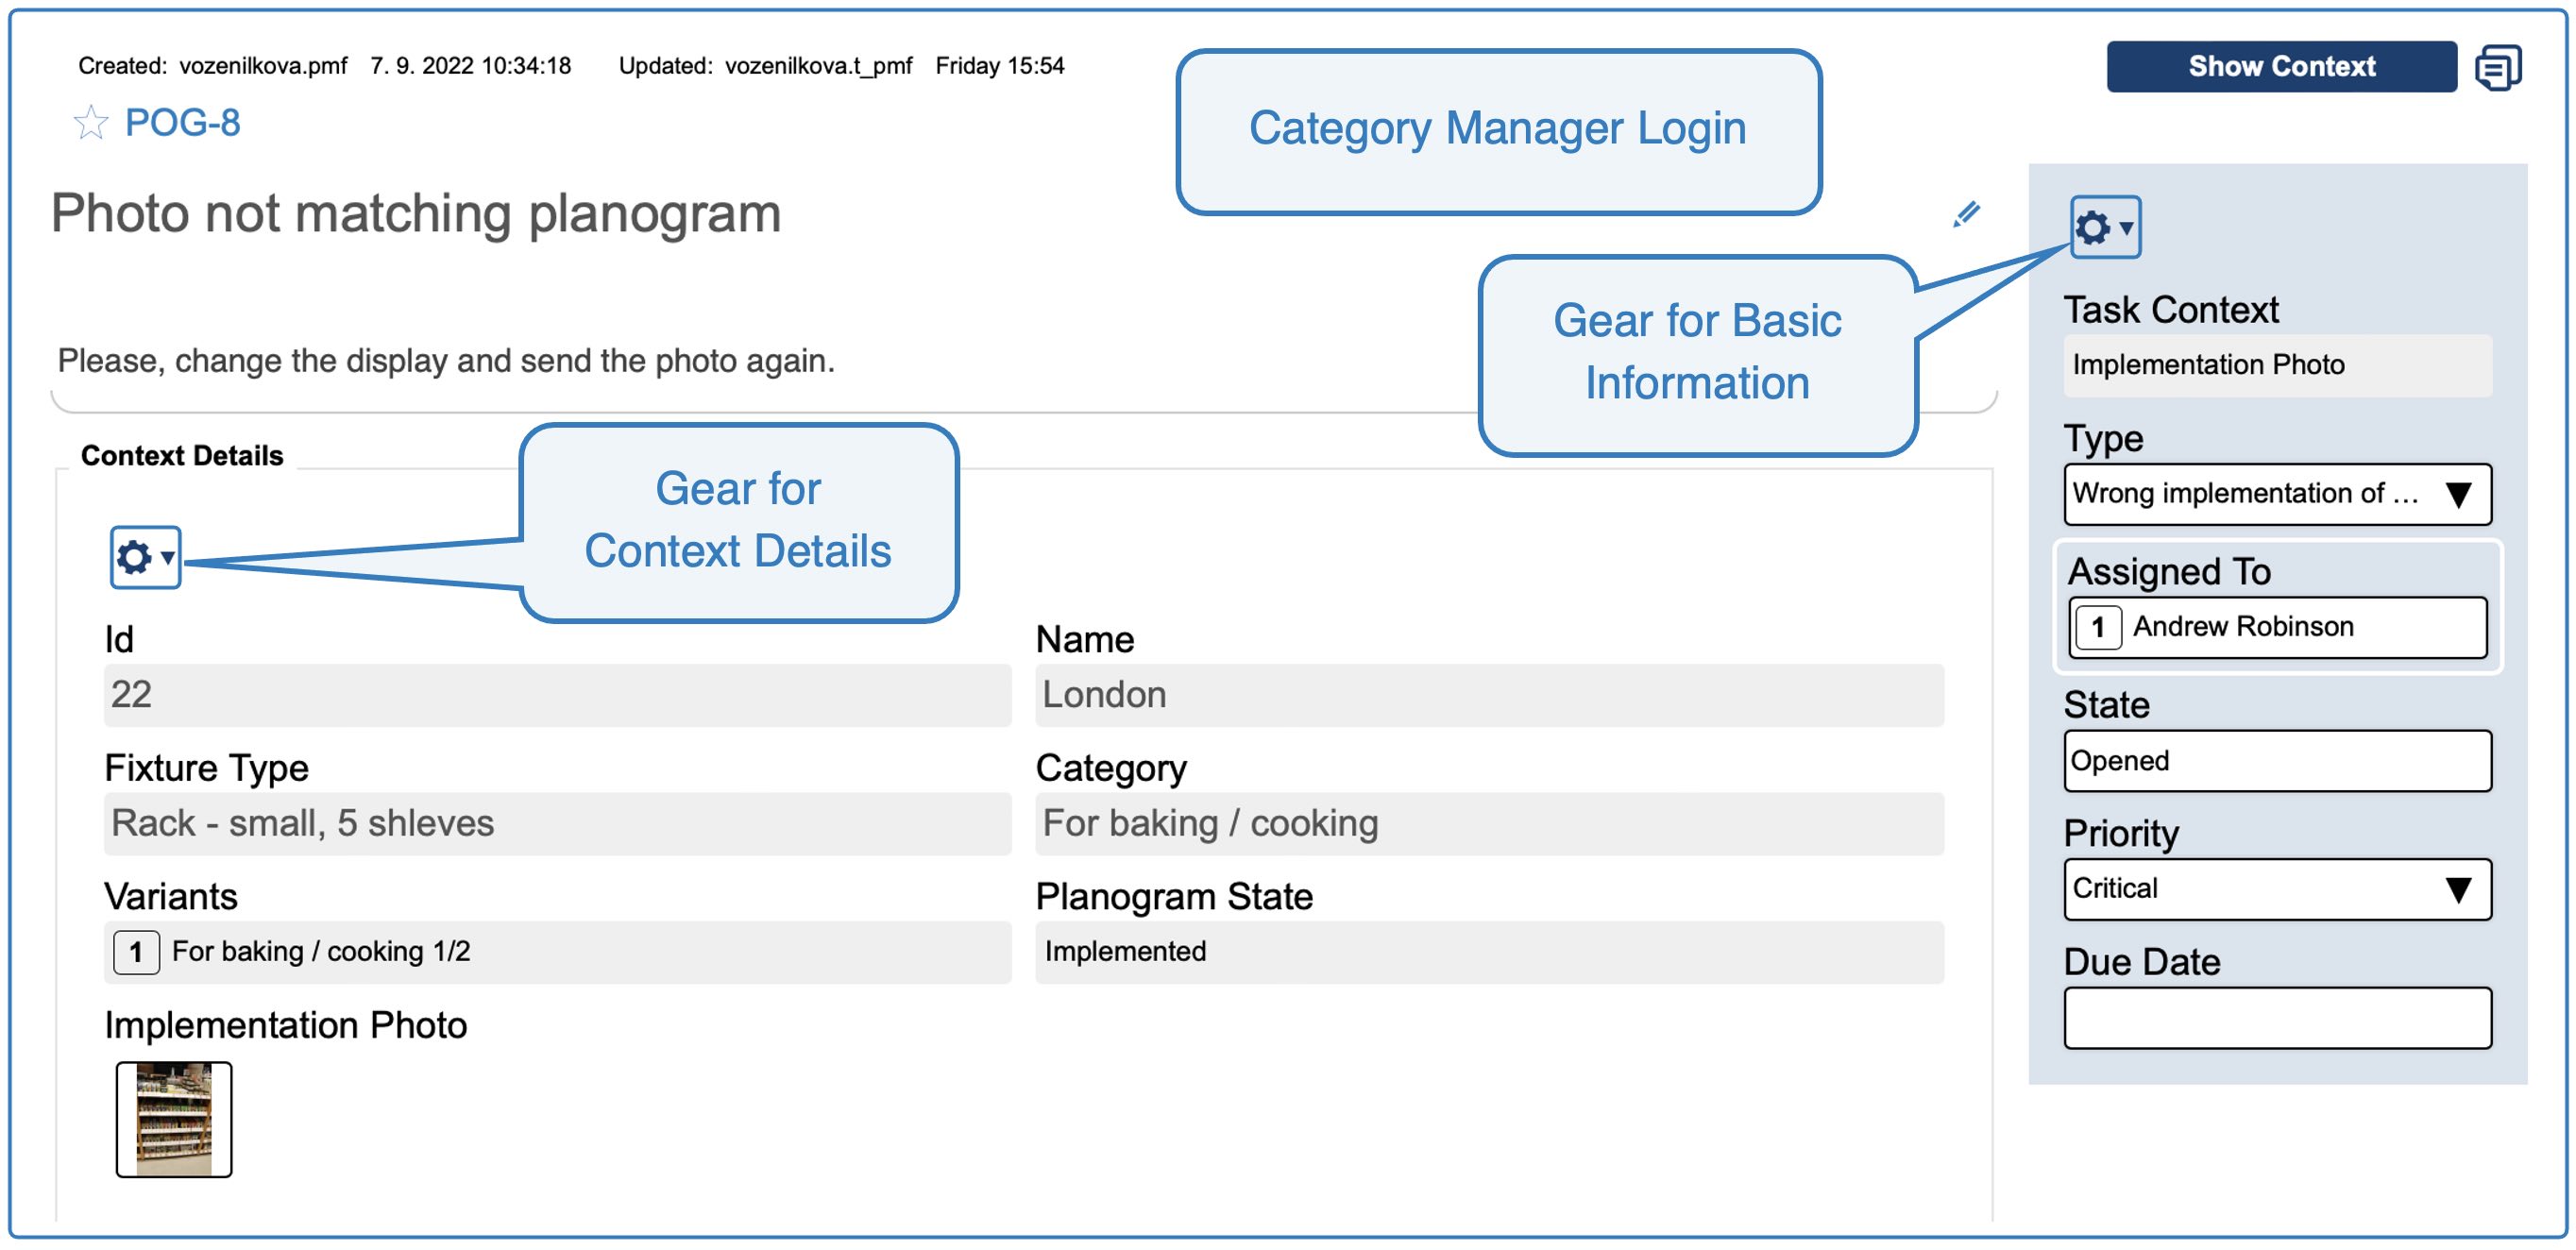 Multiple configurations in task detail
- XLSX Export - Specifies whether the table can be exported to Excel. If the Enabled checkbox is checked, then an XLSX button will appear on the website, through which you can export the entire table to Excel. You can also set whether you want to export the table header as well, what the file should be called, and whether to include a timestamp in the name.
- CSV Export - Specifies whether the table can be exported to CSV. If the Enabled checkbox is checked, then a CSV button will appear on the website, through which you can export the entire table to CSV. You can also set whether you want to export the table header as well, what the file should be called, and whether to include a timestamp in the name. You can also specify what the field and record separator should be in the CSV.
- Form Name Width [%]- This is the width of the container title (the heading of the section).
- Form Category Width [%]- The width of the categories in a given section. Categories will only appear on the form for properties where you set this in the content and design settings.
Content and Design Setting
The content and design of the table or form is always set in the property:
- Table - in the Tasks Table and Products Table tabs
- Basic Information - in the Basic Information tab
- Context Details - in the Context Details tab
Here you can, for example, select which properties you want to display in this section, in what order, or which properties should be editable.
Some configurations can be set individually for each Task Type, so a separate line will be displayed for each Task Type in the settings. However, the individual setting for each Task Type takes over the general setting in the first row, so it is recommended to set this section first and then make the necessary adjustments for the specific Task Type.
The following section explains some of the settings that can be used here.
- Table Display Type - specifies how the attribute should be displayed in the table. The classic view is the Column view, where the attribute is added as a column to the table. In some cases, the Group view may be useful, where the table will be grouped by that attribute.
- Editable - if checked, the attribute can be edited. If unchecked, the attribute will be displayed, but without the ability to change its value.
You can display the Due Date field for the store to see when the task should be resolved, but the store will not be able to change the value itself because the due date will fill itself in based on the settings on the Task Type.
- Name - here you can set a different name for the attribute, which will be displayed in the appropriate place on the web.
- Category - here you can edit the name of the category to which the property belongs. You can see an example of how categories are displayed in the Context Details section in this image.
- Display Category - the category name for the property will be displayed and the entire section will be divided into subsections by category.
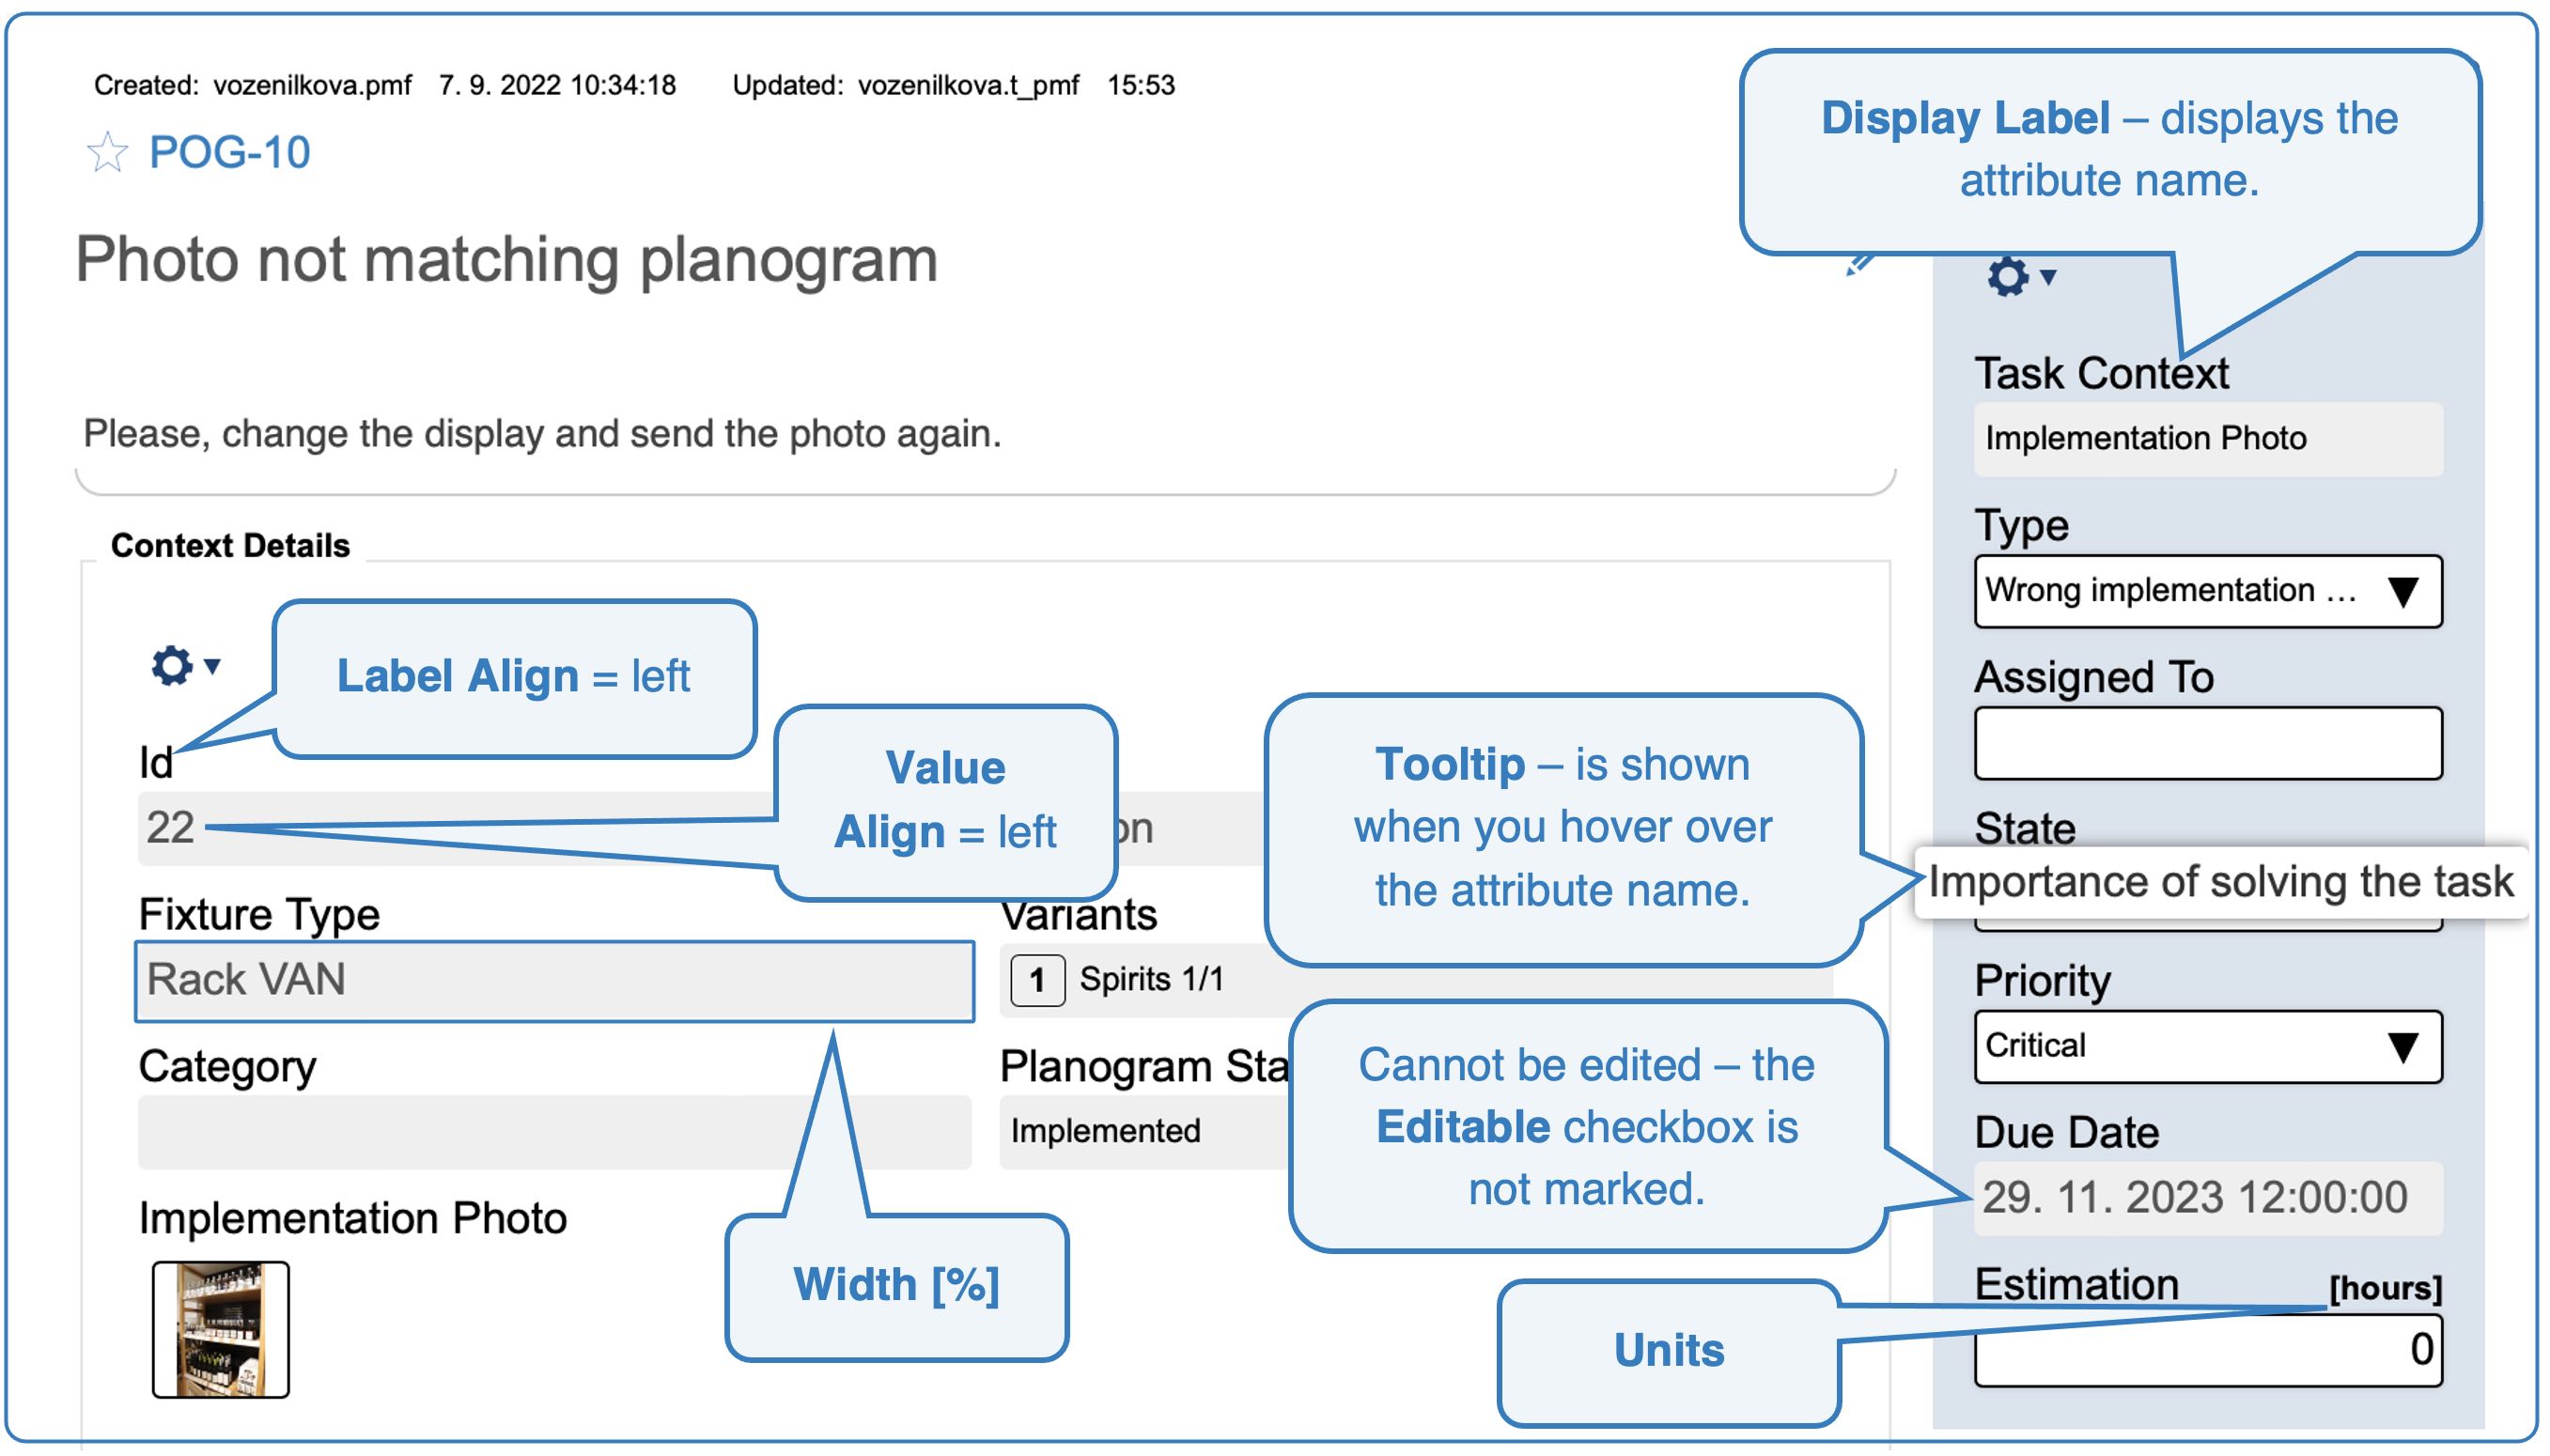
- Tooltip - you can enter an explanation for the attribute that appears when you hover over the attribute name.
- Units - you can specify a unit (e.g. pcs), which is displayed next to the attribute in square brackets.
- Label Align - attribute name alignment.
- Value Align - attribute value alignment.
- Links (section name) - in this section you can set the value in the cell to be displayed as a link and redirect the user somewhere (e.g. to the task detail) when clicked.
- Barcode (section name) - here you can set the attribute to be displayed in the table as a barcode.
- XLSX Export (section name) - you can choose which attributes from the table you want to export to Excel. Here you can specify whether to export the column and you can change the header name if you don't want it to match the header name on the web.
- CSV Export (section name) - you can choose which attributes from the table you want to export to CSV. Here you can specify whether to export the column and you can change the header name if you don't want it to match the header name on the web.
- Table (section name) - in this section you can change the size of a given column on the web.
- Display Label - displays the attribute name. If the box is not checked, only the values are displayed.
- Always Wrap Before - the property is displayed in the next line of the form.
- Always Wrap After - the next property is displayed on the next line of the form.
- Width [%] - the width of the field.
 Attributes setting - on web
For the Info column, you can set which icons can be displayed in which style. If you select the Info property in the middle, then click in the Info Settings property and you can add or remove the information you want to display in this column. Next, if you select a specific info attribute, then in the Style row you can then select whether you want to display only the icon or both the icon and text or only the text.
If you have a large table width, we recommend adding the Freeze Left property. Properties that come before Freeze Left in the sequence will automatically scroll when you scroll to the right in the table. This allows you to always see the task ID, for example, which is usually in the beginning of the table. This can be useful for tables with a large number of columns and on smaller screens.